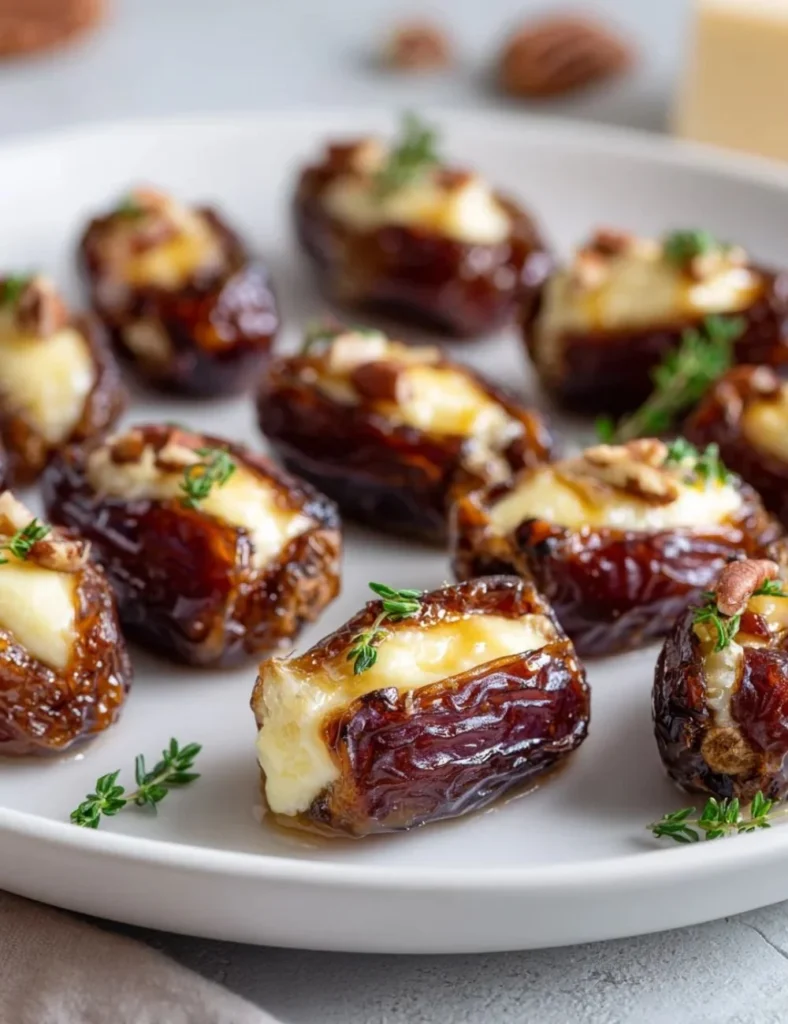
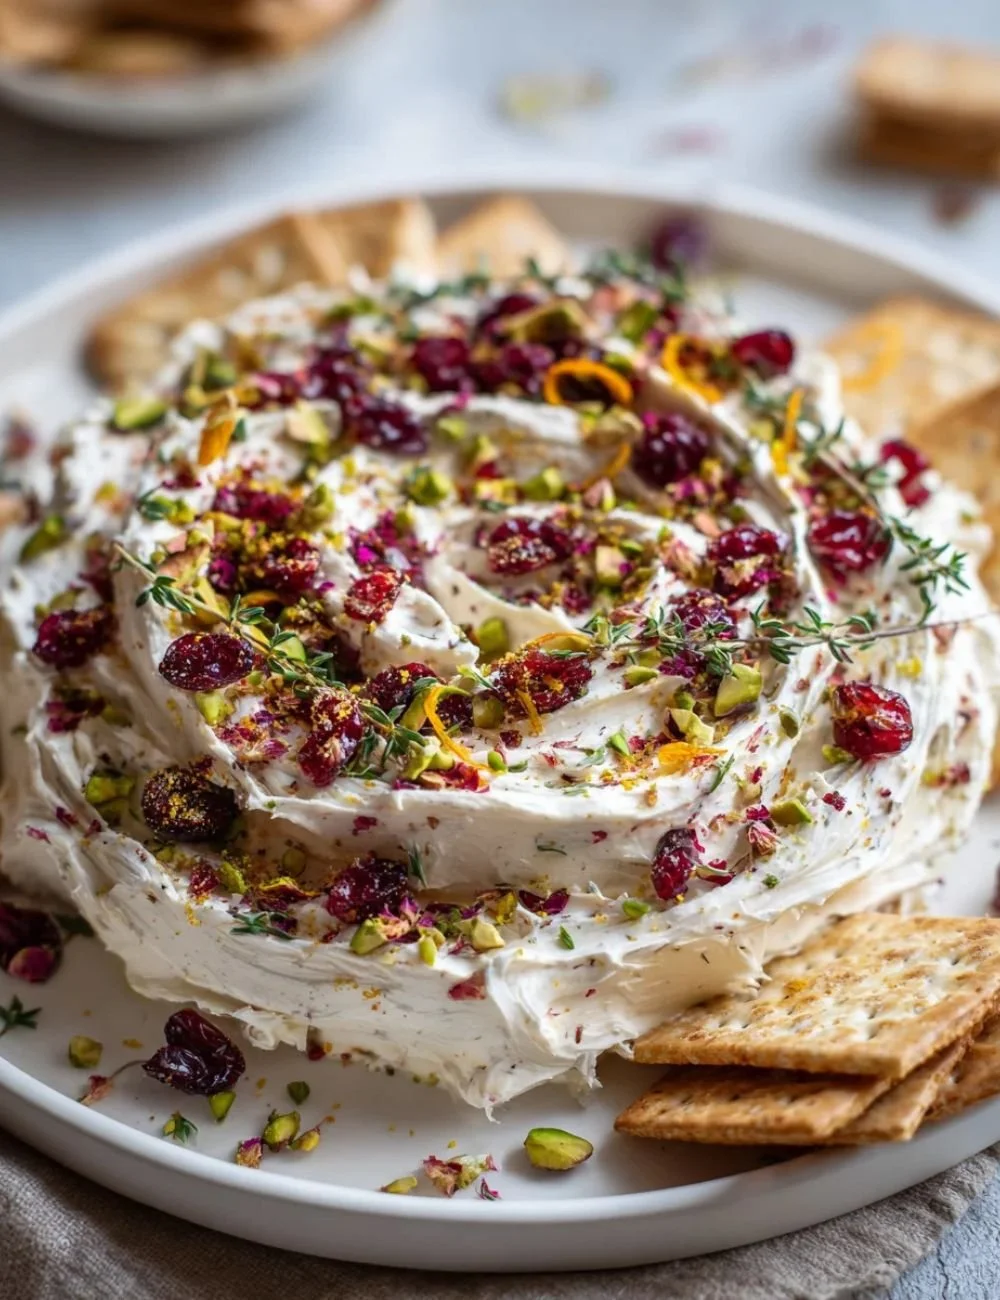
Bright, creamy, and easy to share, a Holiday Butter Board turns simple butter into a festive centerpiece. It pairs savory herbs with sweet toppings and crunchy nuts to create an eye-catching spread. You get a mix of flavors and textures that smell like holidays and taste even better on warm bread or crisp crackers.
Recipe Information
- Prep Time: 15 minutes
- Cook Time: 0 minutes
- Total Time: 15 minutes
- Servings: 6–8
- Difficulty Level: Easy
Nutrition Information
(approximate per serving, assumes 8 servings)
- Calories per serving: 210 kcal
- Protein: 0.3 g
- Carbohydrates: 3 g
- Fat: 23 g
- Fiber: 0.5 g
- Sugar: 1.5 g
- Sodium: 80 mg
Why Make This Holiday Butter Board
A holiday butter board is fast to make and looks festive on any table. It gives guests a fun way to customize every bite. The butter stays rich and silky. Toppings add crunch, sweetness, and fresh herb aroma. You can adapt flavors to match your menu. It’s a simple way to make a snack feel special.
How to Make Holiday Butter Board
Start with room-temperature butter so it spreads smooth and creamy. Mix in herbs and spices for a fragrant base. Spread the butter thick on a board or plate so toppings stick and stay visible. Scatter sweet and savory toppings in groups for color and texture. Finish with a drizzle of honey or a sprinkle of flaky salt for shine and flavor contrast.
Ingredients:
- 1 cup unsalted butter, softened
- 1 teaspoon garlic powder
- 1 teaspoon dried herbs (like rosemary or thyme)
- Salt and pepper to taste
- Assorted toppings (e.g., honey, jam, nuts, fruits, dried herbs)
- Crackers or bread for serving
Directions:
Step 1: Preparation
Bring the butter to room temperature so it softens. Choose a flat serving board or large plate. Wash and dry any fresh fruit or herbs. Measure the garlic powder and dried herbs.
Step 2: Mixing
Place the softened butter in a medium bowl. Add the garlic powder, dried herbs, and a pinch of salt and pepper. Use a spatula to mix until the seasoning is evenly distributed and the butter looks smooth.
Step 3: Cooking
Spread the seasoned butter thickly across your serving board or plate. Use the back of a spoon to make waves or a smooth layer. This step is about creating a base — no heat required.
Step 4: Finishing
Arrange assorted toppings over the butter. Group nuts, fruit, jams, and herbs in clusters or lines. Drizzle honey or a little jam for shine and sweetness. Serve immediately with crackers or sliced bread.
How to Serve Holiday Butter Board
Serve the board at room temperature so the butter stays soft and spreadable. Provide small knives or spreaders so guests can help themselves. Offer a variety of crackers and toasted bread slices. For a party, place the board in the center and add small plates nearby. The board pairs well with wine, sparkling cider, or a winter cocktail.
How to Store Holiday Butter Board
- Short term: Cover the board tightly with plastic wrap or transfer leftover butter to an airtight container. Keep in the refrigerator up to 5 days.
- Freezing: Spoon seasoned butter into a freezer-safe container or roll into a log in parchment. Freeze up to 3 months. Thaw overnight in the fridge before serving.
- Tip: If you make the butter ahead, wait to add delicate fresh toppings until serving to keep them bright.
Expert Tips for Perfect Holiday Butter Board
- Soften butter quickly: Cut into small cubes and let sit 10–15 minutes. For faster softening, place cubes in a warm spot or microwave on low power for 5–8 seconds at a time.
- Texture contrast: Use crunchy nuts and seeds to balance the creamy butter.
- Flavor balance: Add a touch of acid (a few drops of lemon or a sprinkle of citrus zest) if the butter tastes too rich.
- Decorative spread: Use the back of a spoon to create peaks and valleys that hold toppings and look pretty.
- Salt last: If using unsalted butter, add salt a little at a time and taste. Flaky finishing salt on top brightens flavors.
- Allergy swaps: Use seed butters or dairy-free butter to make the board vegan or nut-free.
Delicious Variations
- Savory Herb Board: Use fresh chopped rosemary, thyme, chives, and a sprinkle of Parmesan. Top with roasted garlic and olives.
- Sweet Citrus Board: Add orange or lemon zest to the butter, top with dried cranberries, candied nuts, and a honey drizzle.
- Spicy Honey Board: Mix in a pinch of chili flakes and smoked paprika; top with toasted almonds and a warm honey drizzle.
- Vegan Butter Board: Use vegan butter, swap honey for maple syrup, and top with roasted seeds and fresh figs.
- Holiday Cheese Twist: Scatter small cubes of aged cheddar or brie on the board for guests who want a richer bite.
Frequently Asked Questions
Q: Can I use salted butter instead of unsalted?
A: Yes. If you use salted butter, skip adding much extra salt. Taste as you go. Salted butter can change the final salt level quickly.
Q: How far ahead can I make the butter?
A: You can mix and shape the butter 1–3 days ahead. Keep it covered in the fridge. Add fresh toppings just before serving.
Q: Is this safe for guests with nut allergies?
A: You can easily make it nut-free. Use seeds (pumpkin or sunflower) or toasted grains instead of nuts. Label the board so guests know.
Q: How do I transport a butter board to a party?
A: Spread the butter on a flat, shallow container that has a lid. Pack toppings separately and add them at the venue to keep them fresh.
Q: Can I warm or melt the butter on the board?
A: No need. The butter should be soft but firm enough to hold toppings. If it melts, refrigerate briefly to firm up, then bring back to room temperature before serving.
Q: How many people does this serve?
A: The recipe serves about 6–8 people as an appetizer. Adjust butter and toppings quantity for larger crowds.
Q: What breads or crackers work best?
A: Choose a mix: thin crispy crackers, seeded crackers, toasted baguette slices, and rustic sourdough. Warm bread makes the butter taste extra rich.
Conclusion
A Holiday Butter Board is a simple, beautiful way to add festive flavor to any gathering. It’s creamy, fragrant, and full of texture — perfect for sharing. For more inspiration and layout ideas, see this guide from The Modern Nonna: How to Make a Holiday Butter Board – The Modern Nonna. Try one for your next party and enjoy how easy it is to impress guests.
Print
Holiday Butter Board
- Total Time: 15 minutes
- Yield: 6-8 servings 1x
- Diet: Vegetarian
Description
A festive centerpiece featuring creamy butter paired with savory herbs, sweet toppings, and crunchy nuts, perfect for sharing on warm bread or crisp crackers.
Ingredients
- 1 cup unsalted butter, softened
- 1 teaspoon garlic powder
- 1 teaspoon dried herbs (like rosemary or thyme)
- Salt and pepper to taste
- Assorted toppings (e.g., honey, jam, nuts, fruits, dried herbs)
- Crackers or bread for serving
Instructions
- Bring the butter to room temperature so it softens. Choose a flat serving board or large plate. Wash and dry any fresh fruit or herbs. Measure the garlic powder and dried herbs.
- Place the softened butter in a medium bowl. Add the garlic powder, dried herbs, and a pinch of salt and pepper. Use a spatula to mix until the seasoning is evenly distributed and the butter looks smooth.
- Spread the seasoned butter thickly across your serving board or plate. Use the back of a spoon to make waves or a smooth layer.
- Arrange assorted toppings over the butter. Group nuts, fruit, jams, and herbs in clusters or lines. Drizzle honey or a little jam for shine and sweetness. Serve immediately with crackers or sliced bread.
Notes
For short-term storage, cover tightly with plastic wrap or transfer to an airtight container. Keep in the refrigerator for up to 5 days. For long-term storage, freeze for up to 3 months.
- Prep Time: 15 minutes
- Cook Time: 0 minutes
- Category: Appetizer
- Method: No Cooking
- Cuisine: American
Nutrition
- Serving Size: 1 serving
- Calories: 210
- Sugar: 1.5g
- Sodium: 80mg
- Fat: 23g
- Saturated Fat: 15g
- Unsaturated Fat: 8g
- Trans Fat: 0g
- Carbohydrates: 3g
- Fiber: 0.5g
- Protein: 0.3g
- Cholesterol: 60mg