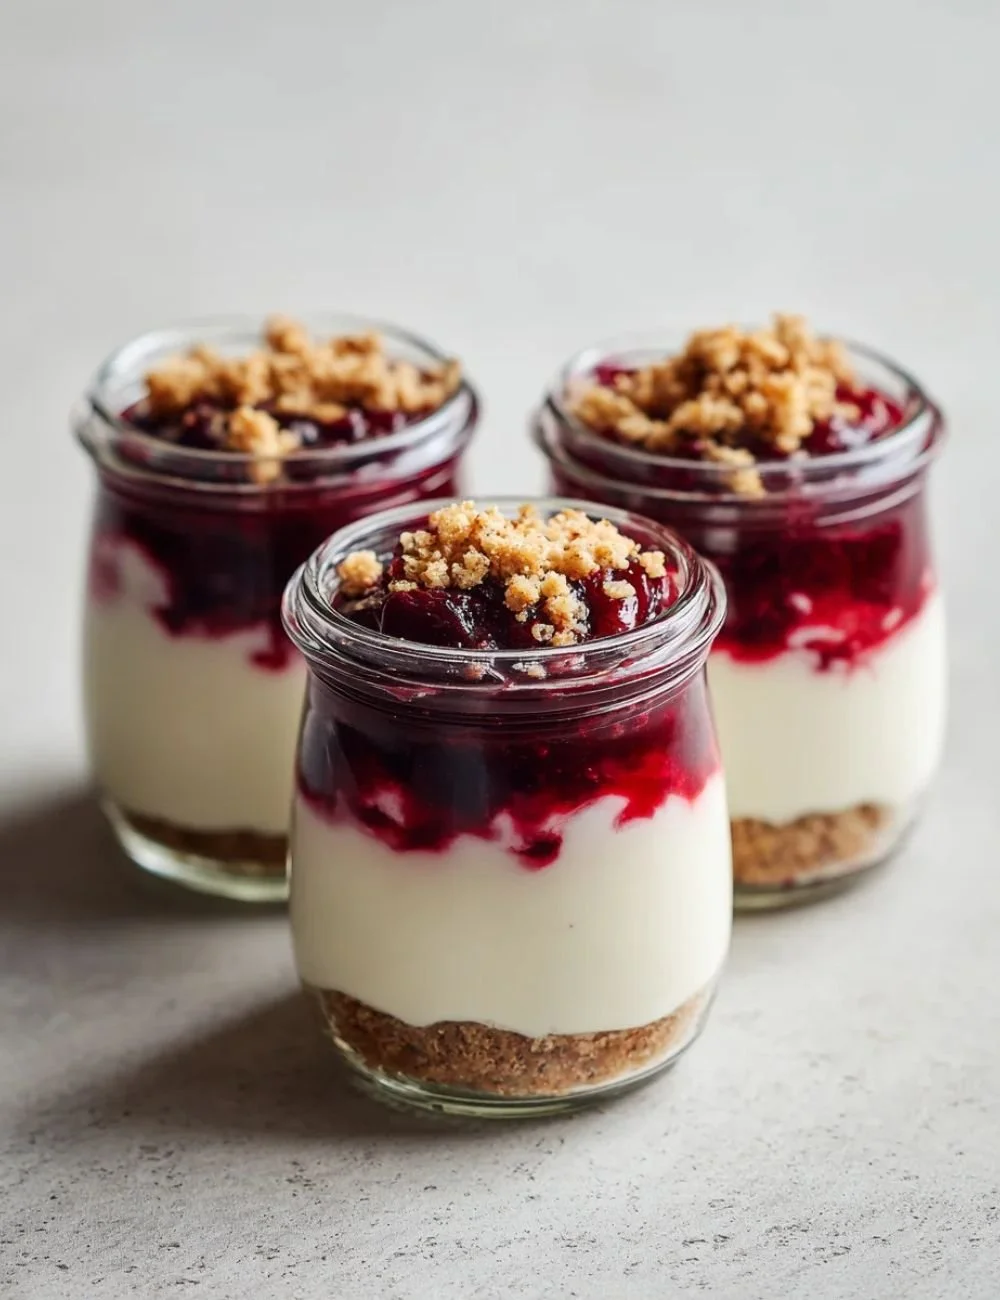
This no-bake Cherry Cheesecake Jars recipe makes a pretty, creamy dessert you can build in minutes and chill until ready. Each jar layers a crunchy graham crust, a smooth cheesecake filling, and bright cherry topping. The jars look festive, taste rich and tangy, and travel well for picnics or parties. If you like trying different cheesecake styles, compare this to a rich Christmas red velvet cheesecake for another holiday idea.
Recipe Information
- Prep Time: 20 minutes
- Cook Time: 2 hours (chilling)
- Total Time: 2 hours 20 minutes
- Servings: 6 jars
- Difficulty Level: Easy
Nutrition Information
Approximate per serving (1 jar):
- Calories per serving: 760 kcal
- Protein: 6 g
- Carbohydrates: 68 g
- Fat: 57 g
- Fiber: 1 g
- Sugar: 44 g
- Sodium: 520 mg
Why Make This Cherry Cheesecake Jars
These jars are quick, no-bake, and visually appealing. They balance sweet cherry topping with creamy, slightly tangy cheesecake filling and a buttery, crunchy crust. The jars make portion control easy and are perfect for potlucks, picnics, or a simple family dessert. You get great texture contrast — crisp crumb, silky filling, and juicy fruit — in every spoonful.
How to Make Cherry Cheesecake Jars
Start on a clean work surface and gather your bowls, an electric mixer or whisk, and small jars or cups. The process is simple: make the crust, whip the filling, fold in whipped cream, layer in jars, and chill. Work cold for best texture and fold gently to keep the filling light and airy.
Ingredients:
1 cup graham cracker crumbs, 1/4 cup sugar, 1/2 cup unsalted butter, melted, 16 oz cream cheese, softened, 1 cup powdered sugar, 1 tsp vanilla extract, 1 cup heavy whipping cream, 1 can cherry pie filling
Directions:
Step 1: Preparation
In a bowl, combine graham cracker crumbs, sugar, and melted butter. Stir until the crumbs are evenly moistened. Press this mixture into the bottom of jars to create a crust. Use the back of a spoon or a small measuring cup to press firmly and compact the crust.
Step 2: Mixing
In another bowl, beat together softened cream cheese, powdered sugar, and vanilla extract until smooth. Scrape the bowl sides and beat again to remove lumps. The mixture should be silky and slightly sweet.
Step 3: Whipping and Folding
In a separate bowl, whip the heavy cream until stiff peaks form. Gently fold the whipped cream into the cream cheese mixture with a rubber spatula. Fold with slow, sweeping motions to keep the filling light and airy.
Step 4: Finishing
Layer the cheesecake mixture over the crust in the jars, dividing it evenly. Top each jar with cherry pie filling. Refrigerate for at least 2 hours before serving to set the filling and let flavors meld.
How to Serve Cherry Cheesecake Jars
Serve cold straight from the fridge. Add a sprig of mint, a dusting of crushed graham crackers, or a dollop of extra whipped cream for garnish. These jars work well as individual desserts at dinner parties, picnic packs, or sweet treats for kids. Spoon rather than lick — the layers are beautiful and worth savoring.
How to Store Cherry Cheesecake Jars
Store in the refrigerator covered with lids or plastic wrap for up to 3 days. For longer storage, freeze jars (leave headspace) up to 1 month; thaw in the fridge overnight. If freezing, skip fresh garnishes until serving. Keep jars upright to preserve layers and texture.
Expert Tips for Perfect Cherry Cheesecake Jars
- Soften cream cheese at room temperature for 20–30 minutes. This prevents lumps when mixing.
- Press the crust firmly so it holds together when scooping. A compact crust gives good texture contrast.
- Whip the cream to stiff peaks, but stop once peaks hold. Over-whipping can make the filling grainy.
- Fold gently. Use a spatula and lift batter from the bottom to keep the filling light and airy.
- Chill long enough. At least 2 hours lets the filling set. For firmer texture, chill 4 hours or overnight.
- Use full-fat cream cheese and heavy cream for the best taste and texture. Low-fat versions can make the filling thin.
- If you prefer less sweetness, reduce powdered sugar by 2–3 tablespoons and taste as you go.
Delicious Variations
- Mixed Berry: Swap cherry pie filling for mixed berry compote or fresh macerated berries.
- Chocolate Cherry: Stir 2 tablespoons of cocoa into the cream cheese mixture and top with cherries for a black forest twist.
- Nutty Crunch: Add a tablespoon of finely chopped toasted almonds or pecans to the crust for extra crunch.
- Lemon Cheesecake Jars: Add 1 tablespoon lemon zest and 1 tablespoon lemon juice to the filling for bright citrus notes.
- Mini Tarts: Press mixture into mini tart shells instead of jars for a handheld version.
Frequently Asked Questions
Q: Can I make these ahead of time?
A: Yes. Prepare jars up to 24 hours in advance and keep them covered in the fridge. For best texture, assemble no more than one day ahead.
Q: Can I use store-bought whipped cream instead of whipping my own?
A: You can, but homemade whipped cream holds better and tastes fresher. If using store-bought, pick a stable variety and fold gently.
Q: What size jars should I use?
A: Small 4–6 ounce jars work well. This recipe makes about six 6-ounce servings. Use larger jars and adjust serving count as needed.
Q: Can I replace graham crackers with another cookie?
A: Yes. Use crushed shortbread, digestive biscuits, or Oreo crumbs (without the filling) for different flavors. Adjust butter amount if the cookie is oilier.
Q: My filling looks a bit lumpy — how can I fix it?
A: Beat the cream cheese longer before adding powdered sugar, and press it through a fine mesh if needed. Room-temperature cream cheese mixes smoother.
Q: Is this recipe suitable for kids’ parties?
A: Yes. The jars are portion-controlled and visually appealing. Use plastic jars for safety and skip glass for young children.
Q: How can I reduce sugar in this recipe?
A: Reduce powdered sugar by up to one-third and choose a low-sugar cherry topping or use fresh cherries sweetened lightly with honey or maple syrup.
Conclusion
These Cherry Cheesecake Jars are a quick, no-bake dessert with creamy texture and bright cherry flavor. They are easy to scale, travel well, and look lovely on a dessert table. For another jarred cheesecake idea with similar ease and charm, see this No Bake Cherry Cheesecake In A Jar – Homemade Home recipe for extra inspiration. Give these jars a try — they are simple to make and always a crowd-pleaser.
Print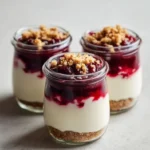
Cherry Cheesecake Jars
- Total Time: 140 minutes
- Yield: 6 jars 1x
- Diet: Vegetarian
Description
A quick, no-bake dessert featuring a crunchy graham crust, smooth cheesecake filling, and bright cherry topping, perfect for any occasion.
Ingredients
- 1 cup graham cracker crumbs
- 1/4 cup sugar
- 1/2 cup unsalted butter, melted
- 16 oz cream cheese, softened
- 1 cup powdered sugar
- 1 tsp vanilla extract
- 1 cup heavy whipping cream
- 1 can cherry pie filling
Instructions
- In a bowl, combine graham cracker crumbs, sugar, and melted butter. Stir until the crumbs are evenly moistened. Press this mixture into the bottom of jars to create a crust.
- In another bowl, beat together softened cream cheese, powdered sugar, and vanilla extract until smooth.
- In a separate bowl, whip the heavy cream until stiff peaks form. Gently fold the whipped cream into the cream cheese mixture.
- Layer the cheesecake mixture over the crust in the jars, dividing it evenly. Top each jar with cherry pie filling. Refrigerate for at least 2 hours before serving.
Notes
For best results, chill jars for at least 2 hours. Use full-fat cream cheese and heavy cream for the best texture.
- Prep Time: 20 minutes
- Cook Time: 120 minutes
- Category: Dessert
- Method: No-Bake
- Cuisine: American
Nutrition
- Serving Size: 1 jar
- Calories: 760
- Sugar: 44g
- Sodium: 520mg
- Fat: 57g
- Saturated Fat: 34g
- Unsaturated Fat: 22g
- Trans Fat: 0g
- Carbohydrates: 68g
- Fiber: 1g
- Protein: 6g
- Cholesterol: 150mg